
🎥 Training video: See the full walkthrough at the end of this article.
Prerequisites
-
You’re signed in with a role that can create payments (Firm Admin or Accountant).
-
The client record already exists in Remitian.
-
A funding bank account is available for the client (linked via your firm or by the client, optional).
-
You have the payment details ready: amount, tax type/agency, period or reference number (if applicable), and the intended payment date.
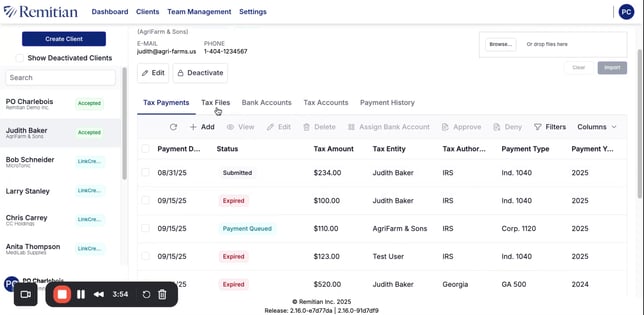
Open Payments
-
In the client navigation, go to Tax Payments.
-
Click Add Payment (or use the Tax Form Import tool).

Review/Add Payment Details
-
Choose the Tax Authority / Agency (e.g., the remittance type required for this payment).
-
Enter the Amount to be remitted.
-
Provide any required period, reference, or account identifiers if shown.
Screenshot – Amount & Details
-
Pick the Payment date (or Due date) from the date picker.
Screenshot – Choose Payment Date
Note: If you’re scheduling for a future date, ensure it complies with any agency or cut‑off times used by your firm to ensure timely remittance.
Choose the Funding Account
-
Select the Bank account that will fund the payment.
-
If left empty the client can assign a bank account during the approval process.
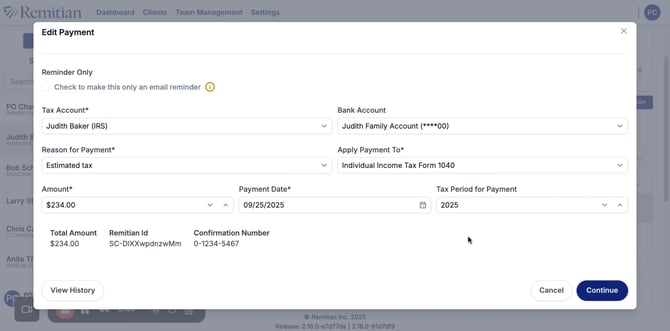
Review & Schedule
-
Review the summary: client, tax type, amount, payment date, and funding account.
-
If everything looks correct, click Continue.
Verify the Scheduled Payment
-
After confirmation, you’ll see the payment listed under Tax Payments.
-
Go to Tax Payments → To view Upcoming Payments to view, track, or manage scheduled items (options may include cancel or edit, depending on timing and policy). or view Payment History to view past payments.
Screenshot – Scheduled Payment / Upcoming List
Watch the full walkthrough: